


If you love nature and wildlife photography, chances are good you have come across a picture that completely blew your mind at some point in your life. Maybe it was a close-up of an amazing plant you had not laid your eyes on before or an awesome shot of the sunset framed by mountainous terrain. Perhaps it was a stunning ocean view picture that got you wondering, “How the heck did they capture that?”
Well, the truth is, most of these impossible-to-believe shots are not easy to come about. Outdoor photography can be challenging because the subjects can be unpredictable. You’ve got to be prepared, practice a good deal of patience, and have some self-made luck. Nevertheless, we have prepared a quick guide for you to get a headstart. Ready?
1. Know Where You’re Headed
Is photography allowed in the area? Do you have to pay a certain fee to take photos? Are there dangerous animals that are likely to interfere with the process?
Even before heading out, do your homework. Get as much information as possible about the area you intend to get on film. Private lands may restrict photography or require you to pay a fee to shoot, so you may want to avoid these. Similarly, if you will be visiting an area with lots of wild animals, you need to bring your best zoom lens and be properly armed just in case.
Never head out clueless. You can never be completely prepared for all the challenges you might face outdoors, but knowing what to expect will help you stay safe and enjoy your expedition to the max.
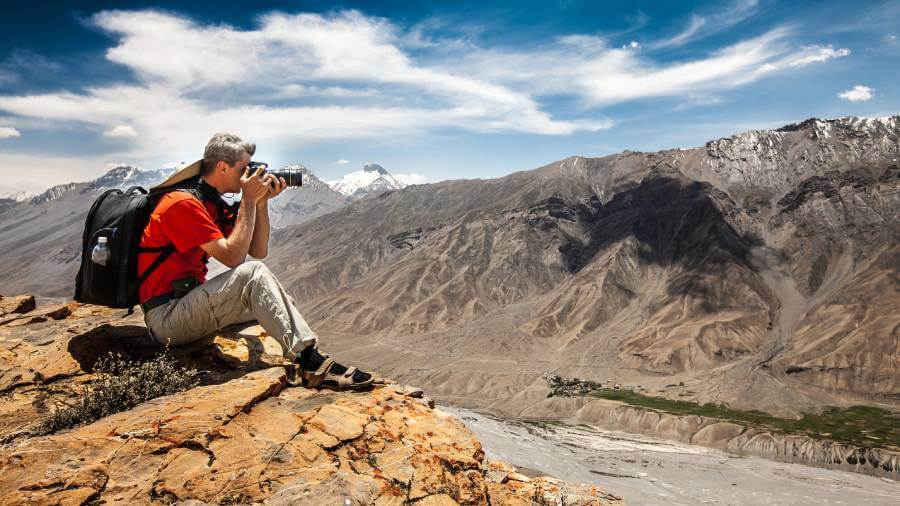
2. Gear Up
…and do it right!
You don’t need the most expensive camera for hiking and backpacking, nor do you need the greatest telephoto lens to have breathtaking wildlife and landscape photography. Sure, these can be nice to own. But since you will be surrounded by charming and beautiful views, all that’s required are perseverance, patience, and image-capturing skills.
However, you still need to know what your kit can and cannot do to avoid disappointment. And aside from knowing where you are going, you’ll also need to know what you’ll be shooting. While there is no all-purpose lens that can cover every situation or secret formula to take the best shots, being well-informed will help you create stunning images.
If you think your day will end with a dive into the nearby lake, pack a waterproof camera so you can capture all the awesomeness of the underwater world. It’s also a great investment if you love fishing and would like to get some of those bass and catfish moments on film. That way, even if something goes wrong and the camera slips overboard, it won’t get damaged by water. You can also buy camera housing to better shield your expensive gadget from water damage.
As for what you should pack, extra lenses, memory cards, batteries, and a tripod are a no-brainer. For wild animal and bird photography, bring your best zoom lens. This will help you maintain a safe distance between you and the subject, especially if it gets scared easily. A macro lens, meanwhile, is perfect for capturing small creatures (like insects) and details. and make sure you have learned how each item works before heading out.
How about navigation? Here’s our tip: Don’t just rely on your GPS. Have a map and compass handy. You may also want to bring a flashlight just in case the night catches up with you in the woods.
Finally, don’t forget your selfie stick so you can take a picture of yourself hanging off a cliff or kissing a cuddly animal!
3. Pack Your Kit Properly
You may own the most high-end tools available for outdoor photography, but if you don’t know how to pack them properly, then your investment might just go to waste. If you are serious about taking your photo shoot to the wilderness, then you must invest in a bag that can carry your essential tools securely.
Look for a camera bag that straps snugly on your body. There are plenty of these in the market, with options available for every budget. Of course, the deeper your pockets are, the higher the quality of the camera bag that you can buy.
It would be wise to consider a bag that’s waterproof. The weather can be quite unpredictable out in the woods, and having a bag that doesn’t let water in will keep your photography gear dry and safe from the harsh atmospheric conditions.
Unfortunately, most of the water-resistant camera bags available today come with a high price tag. However, this should not discourage you from heading out when it rains. Any kind of weather can yield unique and fantastic photos. You can just grab a rain cover and wrap it around your kit carrier. And if you can’t get a hold of this either, even a trash bag can do the trick!
4. Dress For The Occasion
For your outdoor photography shoot to be successful, you must be comfortable in what you are wearing. And to dress right, you need to listen to what the weatherman says.
If you are hiking in cold weather, for instance, put on something warm. Good layering, topped with a fleece jacket, would be a great place to get started. Don’t forget a pair of gloves too! The last thing you want is your fingers being completely frozen that you can’t even press the shutter button.
Mind your feet as well. A sturdy pair of hiking boots will keep them warm, comfy, and protected from snow, water, rocks, mud, and creepy crawlies. If your feet get cold or uncomfortable, you will start thinking about aborting your expedition—exactly what you do not want.
Finally, it’s always a good idea to have a raincoat or a waterproof poncho in your bag. You never know when it’s going to rain!
5. Shoot Raw
Once you are on site, shoot in “raw” format so you can obtain the best quality and more powerful images. You can set your camera to this format to capture unprocessed photos straight from the image sensor.
While raw images usually take up more space on the memory card than JPEG files, they do contain a larger amount of pixels that allow for more room for adjustments during image processing.
6. Take Advantage Of Natural Light
Natural light is outdoor photography’s best friend. Your photos will look amazing in the morning when the sun rises, as well as in the late afternoon when the sun starts to set. the light during these “golden hours” has a mellow, foggy quality that illuminates your subjects beautifully and removes the harsh midday shadows. The golden hues from the rising or setting sun provide an emotional overlay to the images, giving them a spectacular look.
Don’t believe us? See for yourself and try shooting during sunrise or sunset, and at noon. You will clearly notice the difference in color temperatures and tones in photos taken during these times. Mornings are more preferred to evenings as photography areas are less crowded, and you won’t worry about running out of light. If you are shooting wild animals, this is also the time when most species are more active.
7. Show ‘Em Off!
You shouldn’t keep all those precious memories with Mother Nature to yourself! Share your pictures with your friends and relatives, post a few shots on social media, and get a frame to display your favorites.
Speaking of frames, a digital one will be perfect. A NIX frame will do things that traditional frames can’t, like displaying photos in a slideshow, shuffling, and playing HD videos. If you are looking for a way to smartly display and organize your photos, this is it. Just plug your camera’s SD card, sit back, and enjoy the show.
Sure, a digital frame could be a little pricey, but it is the most high-tech way to showcase your prowess in nature photography. Grandma will also thank you because she won’t have to keep going back and forth to your web page for photos!
Summing It Up
Outdoor photography can be challenging, but if done right, you can reap huge artistic benefits as well as spiritual and personal rewards.
Nature never gets old. There are endless opportunities to capture fantastic photos of the wilderness. Just make sure to do your research before you go, prepare the gear your need for the day, and know the perfect time to shoot.
Finally, don’t cancel your trip just because you think the weather would not be good. Good atmospheric conditions don’t always guarantee good shots, and you can get splendid images even in harsh weather. Just dress appropriately, protect your gear, and get going!