Tag: photography Page 2 of 6

how to photograph fireworks

How To Photograph Fireworks Like A Pro

With the Fourth of July coming up, it’ll be good for you to know how to take great photos of fireworks. They’re one of the most majestic things you can see–and one of the most challenging subjects to capture on camera. If you want to improve your fireworks photos, here are some tips to get you started. 

How To Photograph Fireworks Like An Expert

Scout for a great location

When shooting fireworks, it’s crucial to secure a good spot from which you can capture the magic without obstruction. Location matters, and if you can find an elevated space away from the crowds (to make sure that people’s heads or limbs won’t be in your shot), that would be perfect. Your location also plays a huge factor in your photos’ background. Do you want to shoot fireworks against an unobstructed night sky, the city skyline, or the mountains? Where you’ll be shooting can spell the difference between a good fireworks photo and a great one.

Use a tripod and a remote

Now that you’ve secured your location, the next thing you need to do is to secure your camera so you don’t end up with blurred shots. This is especially important for fast-moving subjects: when every split-second counts, you want to make sure you’re prepared. A tripod should come in handy, and controlling shots using a remote can further reduce camera shake.

Think about your framing

First things first: Are you shooting landscape or portrait? The former is great if you’re including the surrounding scenery, while the latter is better if you want to highlight the fireworks.

You also have to remember that different types of fireworks have different heights. Adjusting your camera constantly to get the fireworks in the frame could result in missed shots. Instead of trying to take photos of every explosion, it’s more efficient to just focus on a particular section of the sky and capture the action there. 

Use slow shutter speeds and shoot at a low ISO

Long exposure shots are perfect for capturing the fireworks’ movement. Try to keep the shutter open from the moment the firework starts to explode until it finishes exploding. But don’t try to keep it open too long, lest you overexpose the shot.

Shooting at a high ISO will result in brighter but noisier images–something you don’t want if your goal is to capture the contrast between the fireworks’ bright lines and the inky sky as cleanly as possible. 

nixplay secret sale

Don’t forget to display your fireworks photos on a Nixplay Frame! We’re having a Secret Sale on our US site right now: Get up to 25% off selected frames, only until July 12!

Marianne is Nixplay’s Web Content Editor. Her hobbies include exploring new places, playing table tennis, and cuddling puppies. Send her a message at marianne.salazar@nixplay.com.

how to look photo-ready for st patricks day

How to Look Photo-Ready for St. Patrick’s Day and Beyond

Looking picture-perfect is a goal many strive for. This is especially true on holidays like St. Patrick’s Day, where office parties and parades are abundant and pictures are captured to commemorate the events. If you’re worried about your celebrations not being photogenic enough, now is the perfect time to set yourself up for success on St. Patrick’s Day and beyond. Make sure you’re photo-ready for whatever event is thrown your way with these tips and tricks!

Let your outfit take center stage in photos

You wouldn’t want to look back on your photos from St. Patrick’s Day and only be able to notice that ketchup stain on your shirt. You will want to make sure your outfit is picked out and planned beforehand to avoid having to rush while getting ready. You also will want to make sure the outfit blends in at whatever activity you’re going to. You don’t want to be the only one dressed up as a leprechaun at your office party, nor would you like to be the only one not wearing green to the bar. Ask around and see if what your co-workers or friends are wearing aligns with your planned outfit for the day.

This advice actually goes beyond just St. Patrick’s Day. Make sure to plan your outfit accordingly for all the events and parties you attend. Just like wearing a color other than green on St. Patrick’s Day, you do not want to be the only one besides the bride wearing white to your friend’s wedding.

Picking out the outfit beforehand will not only save you some time getting ready on the day of the event, but it will also give you some peace of mind that what you’re wearing will be appropriate for the big day. This will let you focus on socializing with friends or co-workers, and not on your shirt being inside out. It will also help you show off your confidence in photos!

Strike a pose

It’s normal to feel uncomfortable in front of the camera, especially when you’re lacking in confidence. Try planning out what pictures you want to snap for the night and how to best pose for them! For group photos, try thinking about where you’ll want to position yourself. You don’t want to be the shortest of the group and get stuck behind your tallest friend at the last second. Being prepared for whatever picture may be captured can also help give you a confidence boost. Plus, a great pose can highlight your body’s best features and minimize the parts you aren’t too confident about.

It’s important that you do some research beforehand (even if your ‘research’ is just practicing poses in the mirror) to see what feels most natural and shows off your figure in the best light. Check out some of these tips to see how you should be posing for pictures!

Get a good night’s sleep and show off your energetic side

Once again, you wouldn’t want to look back on your pictures and only be able to focus on the dark circles under your eyes. Most adults need at least seven hours of sleep every night to feel their best. This is especially important on days like St. Patrick’s Day, when bar hopping and staying out late is common for many. Make sure you’re getting in enough z’s before any big event to ensure you’re looking well-rested in photos!

Getting a good night’s rest before an eventful day like St. Patrick’s Day will be a life-saver, and this will show in the pictures you capture too.

Make sure your skin is glowing and photo-ready

While most photos won’t show every blemish and imperfection on your skin, making sure you’ve maintained a consistent skincare routine will help your skin have a youthful and glowing appearance in photos. The first step to achieving this is to know your skin type. If you have oily and acne-prone skin, a heavy moisturizer may not be the best idea. Do some digging to find out what type of products work best with your skin type. If you’re not exactly sure what category you fit into, be sure to check out this guide.

Next, you’ll want to find the best products for you. Pay attention to how your skin reacts to certain products and watch out for signs of irritation such as bumps or rashes. What may seem like a good product may actually leave your skin looking red and irritated in pictures with friends.

Men should also mind their skincare. If your skin is on the sensitive side, make sure to grab a skin-protecting shaving kit that will give you a clean shave without razor bumps and cuts. This will help you look and feel your best when the camera flash goes off!

Show off your smile

Last but certainly not least, you’ll want to make sure your teeth are taken care of before the big day. Often, the first thing anyone notices in a picture is their smile. The last thing you would want to notice after the camera flashes is a piece of food stuck in your teeth. Make sure your teeth are brushed and flossed just before you leave for your big plans so you can show off that smile. Whitening your teeth doesn’t have to be expensive and time-consuming! If you really want to go the extra mile and achieve a whiter smile, there are lots of simple home remedies that will do the trick. It’s never a bad thing to have the brightest and biggest smile in the room when you ‘say cheese’ before the picture is snapped.

Once the photos are taken and St. Patrick’s Day has come and gone, make sure you can always look back on them with a Nixplay digital frame. Thinking back on those memories with a smile will be the icing on the cake! We hope these tips will help you prepare for your St. Patrick’s Day parties and beyond!

pixpa-banner

Top Photo Apps to Enhance Your Smartphone Images

Images don’t always come perfect from the camera. They usually need tools to stand out. And with mobile camera technology getting better every day, everyone has the potential to take stunning pictures. However, a great camera can only take you so far.

This is where the dozens of photo apps in the market step in. They greatly help in capturing and editing your photos, ensuring you’ll always have images worthy of a double-take (or a double-tap). But not all apps are created equal. The question is, which ones are worthy of the precious space they’ll take up on your phone?

Luckily, one-stop online portfolio website Pixpa already researched some of the best apps for you so you don’t have to waste your researching about each one. This list includes iOS and Android apps, as well as free and paid ones. Here are their top picks:

Snapseed

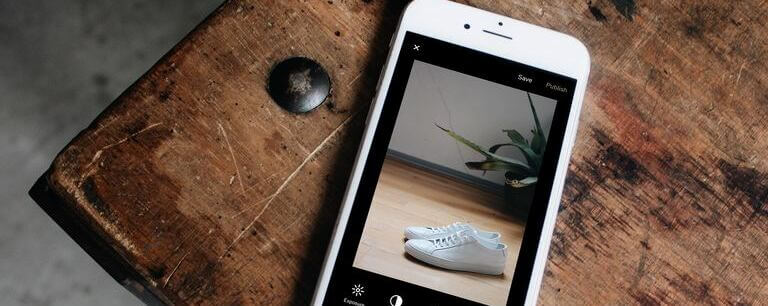
Snapseed is a great photo editor developed by Google. The app can process both JPG and RAW images in a precise manner, and your customized processes can be saved and applied to the photos later. There are 29 tools and filters for your perusal, including curves, lens blur, HDR Scape, double exposure, and more. The best part? It’s totally free.

Yr.no

Outdoor photographers need a reliable app that can tell current and upcoming weather conditions. This is where Yr.no comes in. Yr.no has animated effects for the 48- hour forecast period, with information on wind, temperature, and bad weather warnings. This app was built by the Norwegian Meteorological Institute, meaning you can really trust it when it comes to all things weather.

Adobe Photoshop Express

Photoshop Express is a photo editing and collage-making app used by creative individuals around the world. It has a broad range of photo effects and editing tools–you can add borders and text to photos, enhance their color, add blend effects, remove atmospheric fog, and de-haze pictures to add clarity and sharpness. Photoshop Express is the go-to app for quick fixes and effects, and it’s a must-have in every smartphone photographer’s arsenal.

PhotoScan by Google Photos

Google PhotoScan comes in handy when you don’t have a scanner and want a quick digital version of a printed photo. This app can correct perspective distortion in an image, and automatically fix its edges. PhotoScan’s response time is astounding, allowing it to automatically enhance scanned photos with ease.

TouchRetouch

The TouchRetouch app is focused on the healing and cloning functionalities. This app can remove almost anything that’s bothering you in your photos. Telephone wires, dust marks, pimples–name it, TouchRetouch can erase it. With just a few taps of your fingertips, the app will analyze the picture and remove blemishes correctly.

Instagram

Who hasn’t heard of (or installed) Instagram? Probably the most popular photo-sharing app in the world, this is a great tool to get closer to the people and things you love. Though Instagram has some cool filters, which can be used to add effects to your photos and selfies, and basic editing tools for photo enhancement, its real strength lies in the ways it allows users to share their content. On IG, photographers can share their images with a broad community, directly engaging with their followers and keeping them updated with their latest works. There’s also the app’s Story feature, which lets users upload images and videos that only last for 24 hours, and IGTV, which is perfect for sharing longer videos.

Releases

This app comes in handy when photographers need legal permission from a model or property owner to stage a photo shoot and use the photos. With Releases, you can get the signature of your client on the screen and save the release form in PDF. The app has various templates by the American Society of Media Photographers, Getty Images, and Shutterstock, among other photography resources, which can be edited and used according to your needs. The app is only available for iOS users.

Skylights

If you are a photographer who regularly uses artificial lighting, then you will love this app! With Skylights, you can record the light placement and settings from your previous shoot. Diagrams can be created in this app with just a few taps; there are more than ten categories which you can drag and add. You can easily go back to previous diagrams and edit or add components as required, and you can zoom in and save them to your camera roll. The app is only available for iOS devices.

Hyperfocal DOF

Hyperfocal DOF can be used to calculate the distance closest to the lens where the objects can be focused. This app has more than 1600 camera models to choose from–you just have to set the focal length and aperture used, along with the camera model, and the app will calculate the hyperfocal distance. Hyperfocal DOF is available for both iOS and Android.

WiFi Photo Transfer

This app was developed for iOS users who find it difficult to transfer photos from their mobile phones to their computer. The app creates a Wi-Fi connection to your computer and makes the process of transferring pictures easy.

Geotag Photos Pro 2

Geotag Photos Pro 2 can record your position while you take photos. Even if your DSLR takes the images in RAW format, the app would also be able to record your position. The GPX file downloaded from the app works perfectly with Adobe Lightroom, letting you geotag your photos while editing. The app can also transfer the GPX files automatically to the cloud services of your choice. There’s a dedicated Geotag app for smartwatches like the Apple Watch, along with iOS and Android devices.

Mextures

Mextures is a paid iOS-only app which you can use to easily apply textures, filters, and effects, such as film grain, light leaks, and gradients, to your photos. Like Adobe Photoshop, the app lets you work on layers, which can be edited anytime you want. Mextures also has more than 150 textures, which can be applied using the 12 blending modes, as well as 30 film presets to give your photos the look of popular film footage.

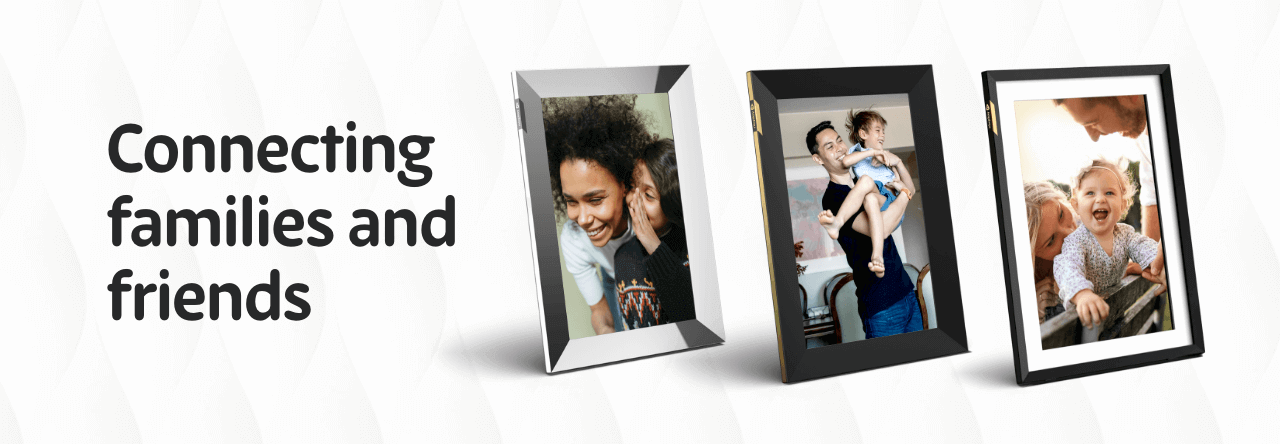
Don’t forget to display your images on a Nixplay Frame! Take advantage of our Back To School Sale to get 25% off selected frames, only until August 25!

better selfies 2019

How To Improve Your Selfie Game This 2019

We’re almost two months into 2019—time just flies, huh? That said, have you changed your profile pictures already? While it’s far from being a necessity, it’s a nice way to edit and reevaluate your social media presence. The easiest way to do this is to take a selfie and get on with your day, but it has to be a really good selfie to be considered profile picture-worthy.

So, how exactly can you take a selfie that’s majestic enough to be featured prominently online? Read on for some easy tips. Don’t forget to display your best selfies on your Nixplay frame!

Use the rear camera.

While the front camera lets you examine how you look while you’re taking your pictures, the lens’ resolution is admittedly less clear. The rear camera has a higher resolution compared to the front camera, resulting in clearer, more defined images. Using the rear camera also forces you to look at the lens instead of your phone’s screen, letting you engage with your selfies’ viewers in a better way.

Find your light.

The key to looking great in all your photos is to look for the most flattering light source and face it. But choose your light carefully. Harsh, fluorescent white light can be extremely unflattering, so opt for natural light as often as possible. Take your selfies outdoors or near windows, when the sun isn’t so high up in the sky. The few hours after sunrise and before sunset, in particular, can bathe you in a beautiful golden glow. If there’s no source of natural light, opt for warm yellow indoor light instead.

Mind your background.

Look for pretty wallpaper, vibrantly hued walls, colorful tiles, or picturesque sweeping views. These seemingly small details will go a long way in making your selfies more interesting and more worthy to be a replacement for your current profile picture. But before you take that photo, don’t forget to check your background first. Look for wires, mess, or trash that you can take out of the frame. And if you’re taking a selfie at a particularly beautiful bathroom—for the love of all that is photogenic, please keep the toilet bowl out of the frame!

Don’t over-edit!

It’s okay to do minimal edits to your selfies: minimize eyebags, neutralize red spots, and adjust the lighting to achieve a great glow. But don’t go overboard and start resizing your nose and shaving your jawline! Too much editing will make you scarcely recognizable, turning you into a completely different person. You want to still be recognizable in your selfies, not to look like a cartoon version of yourself.

Angle away.

You probably have at least one friend who always looks good in all her photos. Either your friend is just really good-looking, or maybe he or she just knows all the most flattering angles. Practice your poses in front of the mirror, and try different angles and smiles until you find the perfect angle: One that elongates your neck, conceals your eye bags, and just makes you look like a better version of yourself.

Valentine’s Day Photography Ideas

How To Make Your Valentine’s Day Photos More Interesting

Valentine’s Day is almost upon us! We’re sure you already have most of the day’s essentials: A great dining destination, a gift, and loved ones to spend the day with.

But wait—you might be forgetting something. Whatever your plans for Valentine’s Day involve, you shouldn’t forget to take pictures! Make sure to have lots of space on your camera or phone, for you’ll surely be capturing so many photos.

But this year, you should strive to make your Valentine’s Day photos more interesting. Here are some easy ways to do so.

Make your flatlays more romantic.

You’ll probably be taking photos of your Valentine’s Day dinner—as you should, on such a special day. Make sure your special meal reflects the romantic air of the holiday by adding heart-shaped elements to your place setting. Consider heart-shaped coasters or placemats, maybe even a heart-shaped plate! You can also sprinkle rose petals or paper heart cutouts on the table.

Capture the tender moments.

Valentine’s Day is all about romance, so take this chance to capture all the precious moments you’ll share with your loved ones. Each stolen gaze, every tender embrace—they all mean so much more on Valentine’s Day. Even the simplest and silliest moments hold more significance on this special day. Go out, be happy, silly, and be yourself with the one you love.

Use props.

Planning a photo shoot? Don’t forget to stash some cute props! Get a bunch of red heart balloons, have a bag of candy hearts on hand, and play around with flowers. It’s easier to relax and act more natural in front of the camera when there are things you can play around with. These add a fun touch to your photos, too!

Use rose-tinted glasses…or rather, filters!

Your photos should evoke the thrilling romance of Valentine’s Day, and an easy way to go achieve this is to stick to a soft pastel-colored palette. Don’t be afraid to be a bit heavy-handed when color-grading your photos, and bathe your images in a rosy glow. If you’re posting on social media, it’s a good time to add filters to your images.

Make heart-shaped bokeh

Feeling a little creative? If you have a DSLR camera, a wide-aperture lens with a lens cap, and a string of lights, you can add cute heart-shaped bokeh to the images you capture. Get dark paper, a cutter or a pair of scissors, and some tape. Lay your lens cap on the paper, draw a circle around it, then cut the circle out. Next, cut out a heart in the middle of the paper, then tape it to the end of the lens. Now, use your camera’s manual mode, and set its aperture to its widest opening. Set your shutter speed to 1/60th, and set your ISO to 400. String up your lights in a darkened room, and focus—every light should produce a heart shape.

Don’t forget to display your images on a Nixplay Frame! Nixplay is having a Valentine’s Day sale, and take our word for this: It’s the best time to get a frame. Take this chance to get the Nixplay Iris at up to 25% off, only until February 14!

Page 2 of 6

Powered by WordPress & Theme by Anders Norén