Tag: digital photography tips

Nixplay Guest Blog - Mark Condon

The 5 Best Investments You Can Make For Your Photography

Taking photos and preserving all of life’s precious memories is so important in this fast world we’re living in.

Even if you’re just using a smartphone to capture all those special moments, that’s better than nothing.

Here are 5 investments you can make to improve your photography this year.

1. Invest in a good camera.

There’s no getting around it – a dedicated camera is still better at taking photos than your phone! Even with the ability to blur the background, take panoramas, shoot multiple frames a second, and all the other fancy features available to smartphone users, phones still can’t compete with “real” cameras.

Don’t worry though – you don’t need to spend an arm and a leg to get a great camera. There are plenty of affordable entry-level DSLR cameras available, some of which cost less than you might imagine.

There are plenty of different features on modern cameras that may or may not be relevant to you, but at the very least, I recommend that you choose a camera with good autofocus. It should also feel good in your hands.

In my experience, a lightweight compact camera is much more likely to be carried by you in your back pocket or handbag than a bulky DSLR. However, it might not feel as nice in your hands.

A nice compromise is a mirrorless camera, which offers great features in a lightweight package, and often with good ergonomics too.

2. Invest in a good lens.

If you own a camera with a fixed lens (i.e. one that can’t be changed), you can skip this section. There’s nothing wrong with cameras with fixed lenses, but I’m referring here to inter-changeable lens (ILC) cameras.

When you buy your first ILC camera, there may be a lens that comes bundled with it. This ‘kit lens’ is normally something like an 18-55mm zoom lens, which is a good way to get to a grip on your first few snaps.

You’ll soon find, however, that the kit lens is usually a little limiting, especially in low light where they typically tend to struggle.

If your budget allows it, investing in a ‘prime’ lens with a fast aperture can do wonders for your photography.

Having a fast aperture will allow you to shoot in low light without a flash, and allow you to blur certain foreground/background elements. This will help give your photos that ‘wow’ factor, making your subject pop out from the image.

Fortunately, each camera brand offers affordable, fast prime lenses. Just look out for a small ‘f-number’, which designates a larger aperture and a faster lens. (If it’s all a bit confusing, you can learn more about aperture here.)

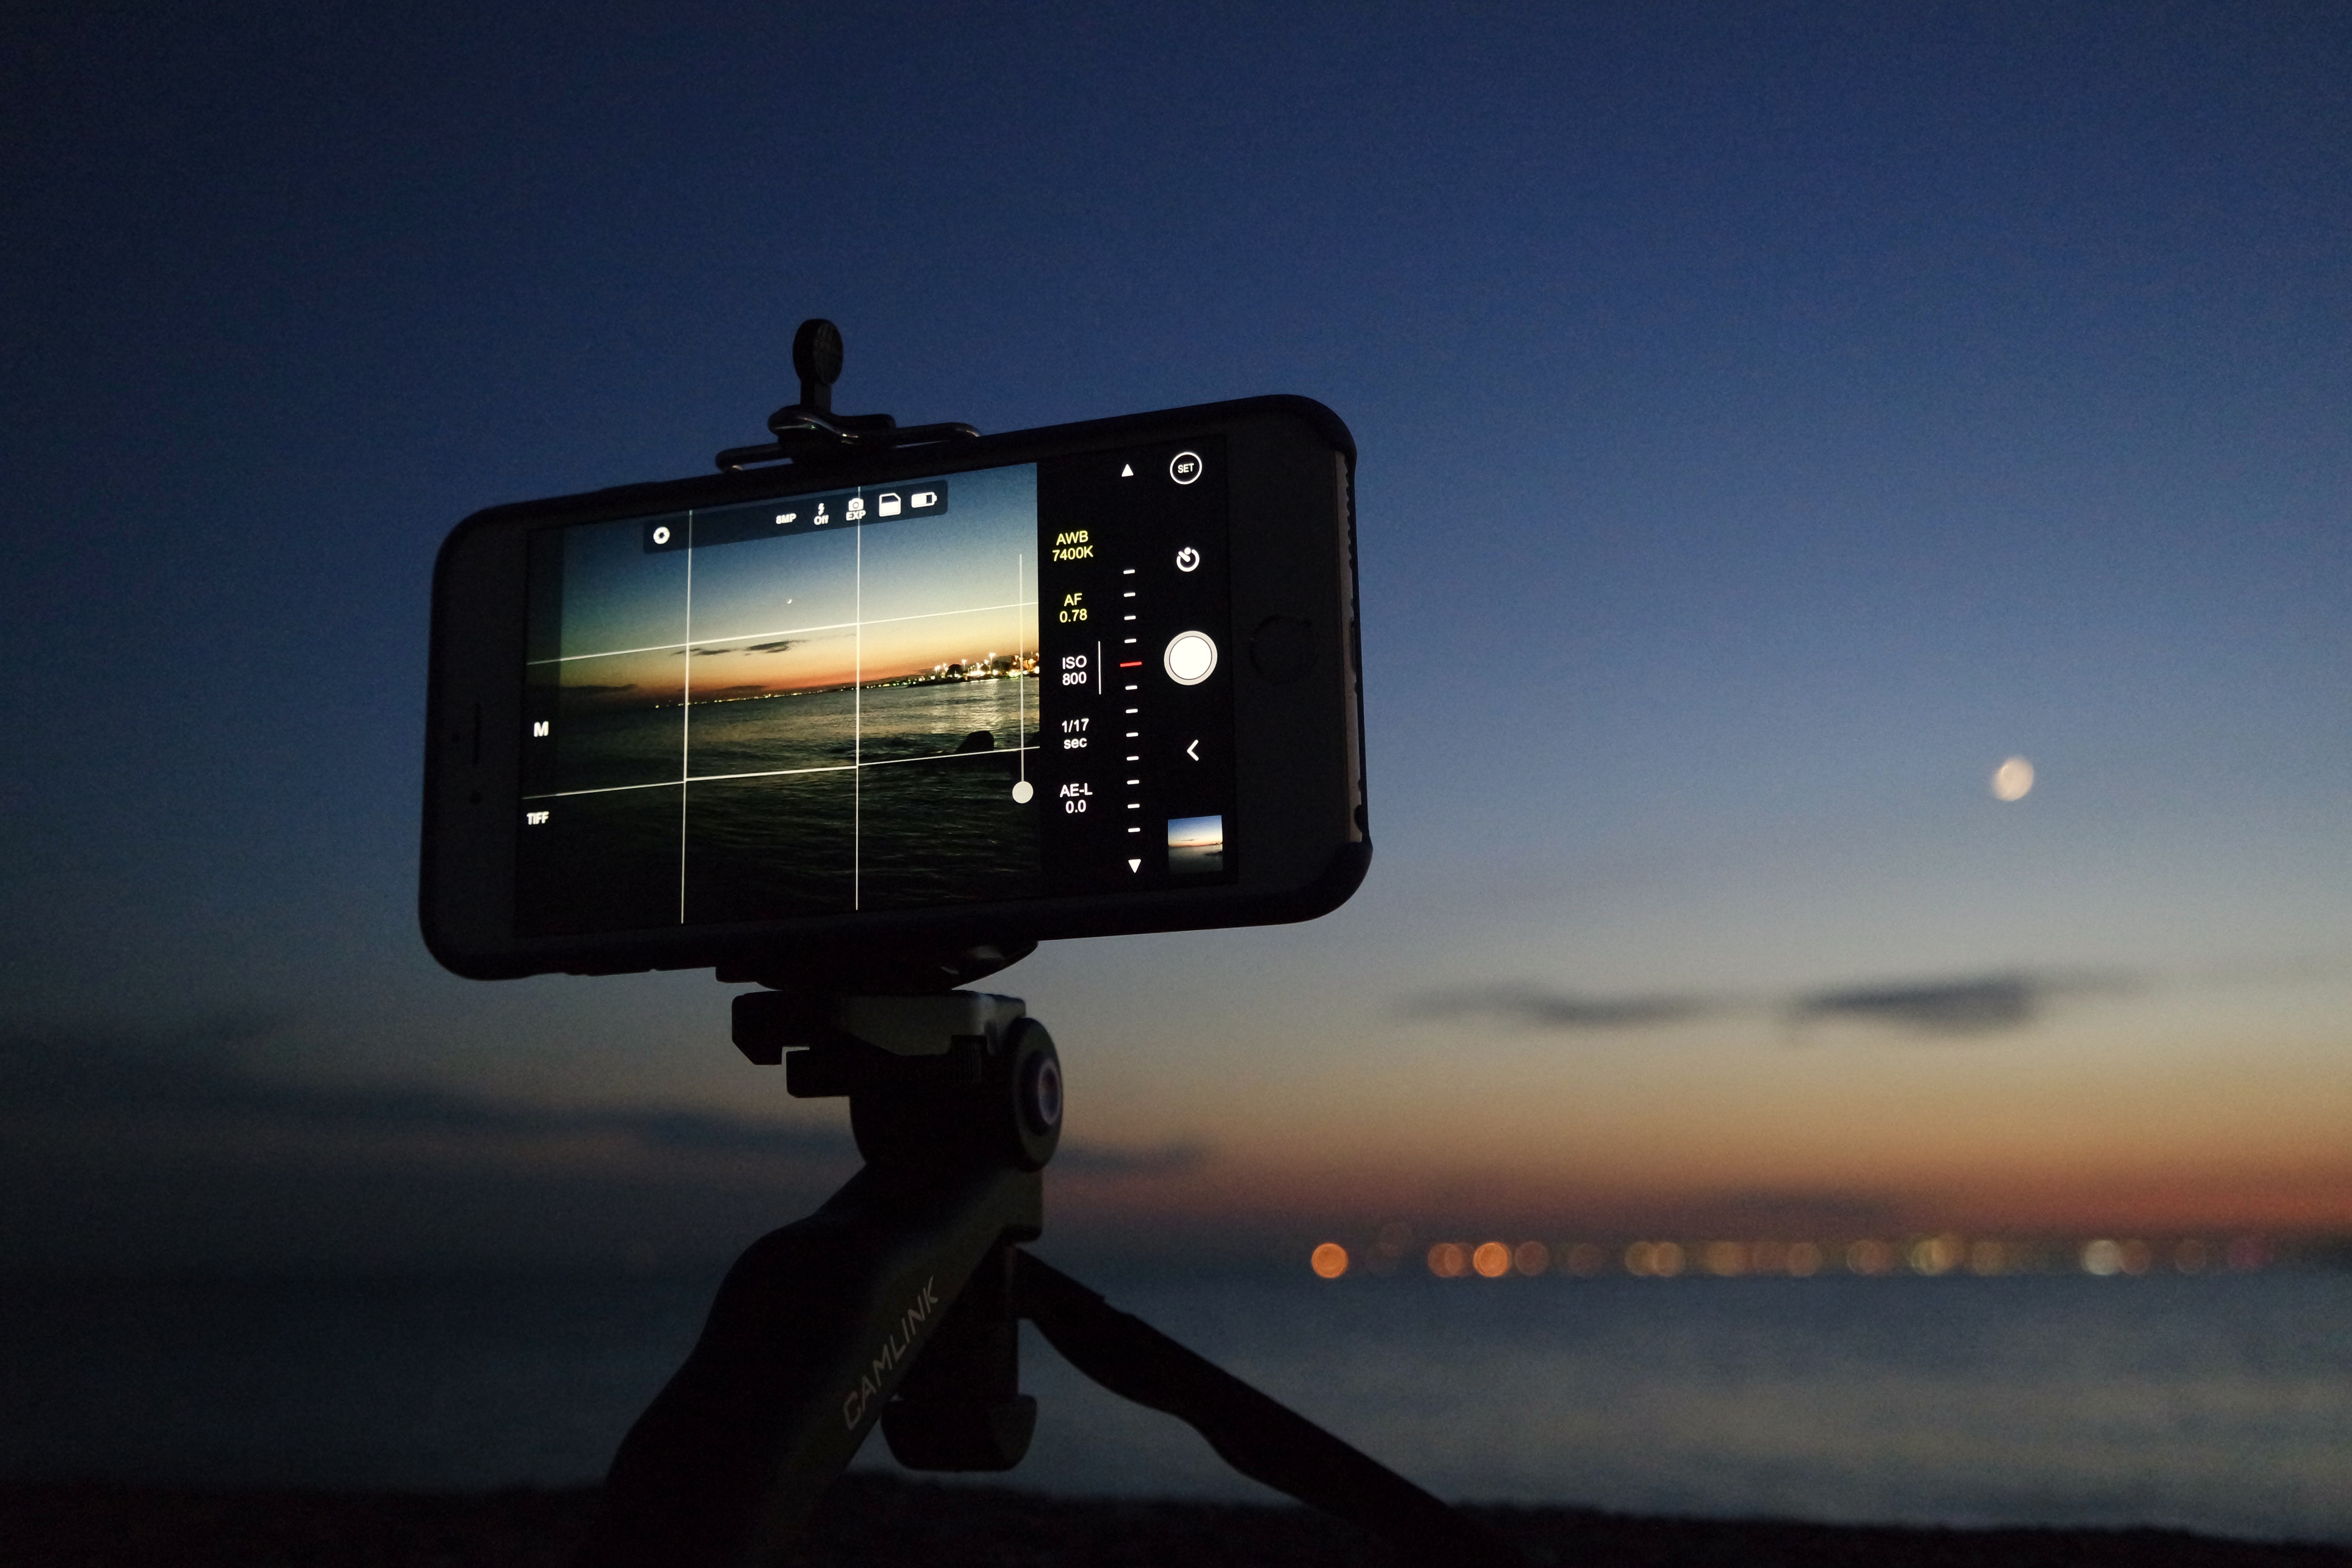
3. Invest in a good tripod.

If I could choose one accessory for your camera which can help improve the quality of your pictures and open up a whole world of creative opportunity to boot, the humble tripod would be it.

These three-legged friends allow you to stabilize your camera, meaning you can get the sharpest possible photo. While you can certainly get a sharp shot without a tripod by combining a fast shutter speed with a steady hand, tripods allow you to really get the most out of the resolution of your camera.

Tripods also make it easier to take a proper panorama, or to experiment with panning shots or long-exposure landscape photos, like those beautiful flowing water shots that you’ve no doubt seen.

A tripod lets you take jaw-dropping images such as this one.

A tripod can help you achieve jaw-dropping photos that simply aren’t possible when you’re holding your camera with your hands. Image by Mark Condon.

There are plenty of affordable DSLR tripods available, and some that are compact enough to carry with you in a coat pocket.

Even if you’re just using your smartphone, a smartphone tripod can allow you to experiment a bit more with your photos. It’s also a good way to easily snap a selfie or group shot!

4. Invest in education.

This investment can be less about money, and more about time. After all, you can learn photography for free using all the online resources at your disposal.

Many of the professional photographers I know learned a lot from watching YouTube, or reading popular photography blogs.

Education may simply mean reading books, which is another wise investment of your time. Books about the basics of photography will help initially, and looking at photos taken over the years by master photographers will help train your eye into recognizing what makes a great photo.

Investing in education doesn’t have to mean enrolling in your local photography school, but if you have something like that available, it can be a great first step.

You can learn all you want by watching free internet videos, but having someone physically move your fingers into the right positions, or point out the correct way to frame a photo, is invaluable.

5. Invest in a way to share your work.

Getting your photos viewed by others is an essential step to improving at photography. Whether that means investing your time in building a photo blog to show off your shots, or simply uploading your photos to social media, improvement comes when you are open to critique.

Whether or not you can trust your friends to be honest enough about the quality of your photos to offer any useful critique is admittedly questionable, but at least by having your friends’ encouragement, you’ll be motivated to keep taking photos.

I remember when I did my first photo project, and posted a new photo on Facebook every day for a month. The words of encouragement I received there made me realize that there was an audience for my photography, leading to a career as a professional wedding photographer.

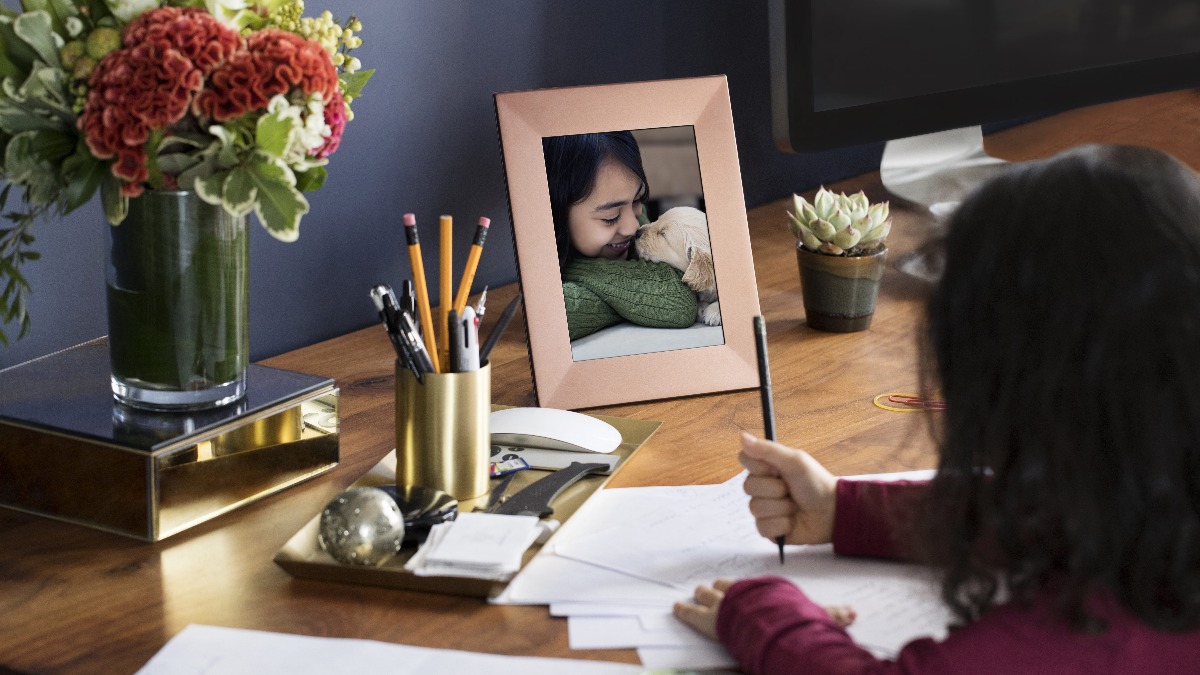
Another great way to share your photos is by using a digital photo frame. Last month I spent some time reviewing the best digital photo frames, and was surprised at how easy it is to share the photos that I take on a daily basis.

All the Nixplay frames are stylish in their own way, and beauty certainly is in the eye of the beholder, but for me at least, the Seed stands head and shoulders above the rest.

As strange as it may sound, I particularly I like the rear of the device. It looks clean and neat, with the power cable acting as a stand.

Although not unique to the Nixplay Seed model, I’m also a big fan of the Nixplay Frames’ Wi-Fi functionality, which makes transferring and managing the images sent to my frames a cinch…and also a lot of fun! Being able to take a photo on my camera or phone then instantly whizzing it halfway around the world to the Nixplay Seed sitting in my family’s living room is simply mind-blowing.

Knowing how happy a photo can make someone is a great motivator to keep pushing the shutter button.

Mark is the founder of Shotkit, a site which gives photography enthusiasts a peek into the camera bags of the world’s best photographers.

This Is The Best Thing You Can Do For All Your Photos

Taking photos is one of the best ways to preserve life’s most precious moments, whether it’s a Sunday dinner with the whole family or your grandchild’s first steps. But what do you do with all the pictures you’ve taken? Saving them on your computer is the first step, but it seems like a waste to just let them languish on a hard drive forever.

Luckily, digital frame company Nixplay has a solution for that. Because Nixplay’s joining the Google Photos Partner Program and using the Google Photos Library API, you’ll soon be able to securely access even more of your most treasured memories on your Nixplay Wi-Fi Cloud Frames anytime, anywhere.

A concept presentation of how Google Photos will be integrated with the Nixplay mobile app. This is not the final product demonstration.

During the 2018 Google I/O Developers’ Summit held on May 8 in Mountain View, California, it was announced that Nixplay will be one of the first companies to launch its integration with Google Photos to its customers in the coming months. With this development, Google Photos will soon send your albums directly to your Nixplay Wi-Fi Cloud Frames, eliminating the need for you to spend precious time selecting photos for your playlists.

The best part is that if you’ve sent albums from Google Photos to your Nixplay frame, every time a new image is added into one of those albums on Google Photos, it will also be automatically uploaded to and viewable on your frame. This feature is especially great for people who live away from their loved ones, as this presents a new way for them to stay connected to them. Now, not only will your treasured moments be within reach, but you’ll always be in touch with those who matter most in your life.

This innovation, scheduled for release in the summer of 2018, is the latest feather in the cap of Creedon Technologies, the parent company of Nixplay and its sister brands, NIX and Nixplay Signage. Creedon Technologies has sold close to 1.5 million units of Nixplay Wi-Fi Cloud Frames, Nix Digital Frames, and Nixplay Signage Solutions since its inception in 2007, making it the global leader in its field. By harnessing the power of cloud storage, service technology, and security, Creedon Technologies has empowered its customers to display their photos and share their memories in a sophisticated manner.

Are you as excited for this as we are? Let us know your thoughts by leaving a comment below!

Marianne is Nixplay’s Web Content Editor. Her hobbies include exploring new places, playing table tennis, and cuddling puppies. Send her a message at marianne.salazar@nixplay.com.

2018 Photo Trends and Predictions

Creativity and authenticity uttered together may seem like a paradox. Some professional photographers may even frown at photography being creative. Sure, they would think of interesting angles, positions and subjects, but most would not go out of their way to heavily edit as authenticity was always important. There was a time that many dear readers may remember which saw programs such as Photoshop associated to those that wanted to cover-up lackluster shots and make themselves look better. In 2018, that is all expected to change.

A Creative Reality:

Creative reality, which at first may sound like a phrase borrowed from the propaganda archives of despot regimes, is actually supposed to convey a sense of beauty. The concept is supposed to blend reality with creative art. These could range anywhere from double exposure to infrared photography and color manipulation. This essentially shows photography as some form of fine art. Whilst this may annoy some, if this distinction is made from the offset, it shouldn’t have any issues. With this, artists are creating their own utopic worlds with colors set to have a warm feel to them, despite it appearing almost psychedelic.

Creative/ abstract photo of the fall. 

Serene Scene:

With most of the world’s population living in cities, this hyperconnectivity, photography is set to move away from various cityscapes to nature. Calm and tranquil scenes will start appearing with increased intensity in 2018.  It almost attempts to visually represent an existential crisis that is affecting the human, i.e. you. Whilst this may sound like a grand term, artists are merely asking the question of what is our connection with nature and how is the world turning its back on it. This is particularly relevant in the age of climate change and global warming.

Tranquility: people are increasingly reconnecting through their camera.

Changing Perceptions of the Self:

Identity is increasingly going hand-in-hand with fluidity. People are now willing and open to take on issues such as same sex marriage or gender equality – this has been reflected in the high impact photographs that should be making the rounds in 2018. This has also burst a whole embrace of multicultural photos, where people are more willing to code mix with cultures, embracing their roots. It often makes for a colorful and interesting blend that draws the reader. Even the Royal Family in the UK are embracing these kinds of shots.

Issues of equality and openness are set to feature prominently in photography in 2018.

A Historical Blend:

With this embrace of multiculturalism, historical portraits are also coming back into the fray. In general, photography is the most authentic way to relive a time period. One can see exactly how the people of a certain period lived and felt.  Actors like Jeremy Irons have even noted that the best practice for any role is to look at the people by examining paintings and photos – getting their expressions, feelings and general life at the time. In 2018, photographers are set to mesh modern photo taking technology, whilst incorporating traditional scenes, elements and even shapes.

Creating that old vibe in photos makes us reflect and enjoy the authenticity of a bygone age.

Inspired for ideas? We’d love to know what you plan on photographing in 2018. Embrace new techniques, experiment, but most crucially (as is the case for us in the Nixplay family) is to have fun, don’t be afraid to take a risk and you’ll be guaranteed to create precious moments with the camera serving as a gateway to memories that last a lifetime.

Nixplay offers consumer digital WiFi picture frames that blend well with the scene. Want to improve your photography or simply present those majestic shots in style – Nixplay frames are the perfect solution.

Bea is Nixplay’s Social Media Manager. She enjoys drinking coffee, reading about wars, and writing stories. Send her a message at beatrice.bisais@nixplay.com.

A Photographer’s Guide to the Universe Part 2

Nixplay is excited to present the first in-depth article of Explore More, a series of content pieces that revolve around unique photo-taking adventures, creating moments and chronicling memories. Be creative, try something new and Explore More. Stay tuned throughout 2018 to further unleash your sense of adventure and love for photography.

Special Note: This is the second part of a special series; part one provides you with a cosmic calendar of all the marvels that the world of astronomy presents for 2018 and helps you set your coordinates to increase your chance in witnessing shooting stars, eclipses, planetary alignments and everything in-between. 

2018 is setting out to be an exciting year for all space buffs that are fascinated with a galaxy far, far away and we don’t mean the latest Star Wars movie. The year has already started out with a big bang thanks to the appearance of the year’s first supermoon on none other than New Year’s Day, a phenomenon that allows space geeks to see the moon 14% larger and 30% brighter, making it one of the easier space events to photograph. Yet, although we live in an age of smartphones where some take a selfie as soon as they stumble out of bed, space photography remains elusive in the eyes of many. In the second half of our space odyssey, we discover tips and tricks that will shine a light on the possibilities and relative ease in capturing that intergalactic masterpiece.

Eclipses and Planets

You may still remember August 21, 2017 , where a large chunk of the US population was exhibiting strange behavior by looking up at the sun. No, they were not out there to work on their tans, but a totality, a complete eclipse where the moon completely blocked out the sun. Gasps and cheers were ambient reminders of the excitement many experienced. Although this didn’t resonate across the animal kingdom with many wondering around very confused indeed. Animals aside, if you were watching the news back then, you would have seen people around with smartphones to capture this momentous occasion, except many struggled to get a perfect shot.

Saturn with its rings taken by NASA JP-Caltech Space Science Institute.

For those in the know, one of the more widely used methods to capture this beauty involves a telephoto lens and whilst it may sound like a mad scientist’s experiment, it’s much easier to use than you may think.  There are two avenues to pursue to capture a good quality, presentable image of planetary sightings (depending on what planet, time of year and how far away from the sun it is) and eclipses  – either with a DSLR camera or smartphone.

The superior method that can create that money-making shot, quite literally, is by using a DSLR camera. Your gear needs to be complemented by a telescope and telephoto lens, especially if you want to get close-ups that go as far as detailing the surface of the object being eclipsed. The ideal range that the focal range should be is 500 to 2,000mm, with a Barlow lens or 2x teleconverter giving it the extra boost. It is very easy to get carried away in all the fun and excitement of new, shiny, heavy equipment, we know.  This is compounded with the fact that most cameras have smaller APS-C sensors, which basically are smaller than the standard film frames, causing the camera to focus on a smaller surface area and cropping out the edges. You would need to either use a focal reducer or using a telescope with a lower focal length.

For folks that don’t want a workout with bulky, expensive equipment, lunar eclipses should be your go-to choice. Whilst it would obviously not allow you to get the most out of your shot, it’s still a method that will help you to capture the eclipse, in focus, which could turn out to be a good piece to add to an album. This doesn’t mean that you can aim your camera directly at the eclipse and hope for the money shot. Far beyond anything of value, you’ll be hard pressed to figure out whether it’s a picture of an eclipse or one that was set off accidentally whilst your phone was in your pocket. ‘Afocal projection’ is the go-to mobile method. Whilst the term may make your sincere writer sound smarter, all it means is that you point your camera right into the eye-hole of a telescope and it should be able to amplify the image to a good, presentable size. You would need to hold the camera steadily or on a tripod, ensuring that the moon looks to be in the center of your camera.

Seeing as eclipses are not fully static, the best practice is to ensure you move the camera every 1.5 minutes. Be sure to keep checking the images that you are capturing; if you start seeing black edges around the photograph, it means that you’re holding the camera too far away from the telescope’s eyepiece. Zooming in slightly is fine, but make sure you don’t zoom in too much – that low-resolution graininess is an enemy of the photographer. Of course, as the technology within phones develops, including their inbuilt cameras (think Huawei) these will only be getting clearer and crisper.

Your checklist should include a spare batter or portable charger at hand (for most eclipses a charged phone or camera will be enough due to them usually not being much longer than 7.5 minutes) and as Anthony Aveni, an astronomer and anthropologist writes in his new book, ‘In The Shadow of the Moon’, you only have 2 minutes and 40 seconds to capture that perfect picture during eclipses.

Comets and Shooting Stars

When it comes to comets and shooting stars, your job may get a bit more difficult. Characterized by their rapid movements across a larger plain to the frustration of even some of the most-famous astronomers that have walked this earth, including David H. Levy: “Comets are like cats; they have tails, and they do precisely what they want.”

Levy’s description stems from the fact that unlike eclipses, the moon and other planets, shooting stars and comets are moving objects that can cover a large plain.  To conquer this issue, wide angle lenses with a large aperture are vital, even when the light is not very vivid – f/2.8 and below (which means faster) would be an appropriate. An f/28 would be good with an ISO 2000. A wide-angle lens would increase the probability of covering a greater territory, thus increasing your chance of a getting the right shot, at the right time – 20mm to 50mm is the range that most photographers go for.

Debris from Halley’s comet causes the annual Orionid metoer shower. Photo by NASA/ESA/Max-Planck-Institute for Solar System Research.

Due to the motion of shooting stars and comments, a good idea would be to preset your camera. That is, unless you have titan fingers of steel and the dedication of a warrior – mostly since there are no warning bells and you cannot precisely calculate the time down to the minute, yet alone seconds in which they take place. The safest bet is to set your camera to capture photos automatically, to which an extension is needed. Known as the intervalometer, it sounds like a prop taken out of a superhero movie, but acts as a cable release that does the photo-shooting for you, with all the appropriate settings pre-programmed onto your camera – including the length and exposure and timing between shots. Finally, like with eclipses, a tripod is needed for stability.

Some may not have or want to spend money on expensive camera gear and the good news is that these lovable moving rocks can be admired and recorded by anyone from your 6-year-old to your grandmother with the help of that little-known device, the smartphone. A good tool to use would be to download an app called ‘NightCap Camera’ and once in can switch on meteor mode that automatically adjusts the settings for you to the best possible for the purpose. This nifty addition helps you take around 750 photos with a 5 second exposure time. Undeniably, like photographing eclipses, moon(s) and planets the pictures will be no-where near as good as on a DSLR, but despite their movements, shooting stars and comets would be easier to capture due to them being easier identified in the night sky even with the naked eye.

Comets are like cats; they have tails, and they do precisely what they want.

David H. Levy, Astronomer, science writer and discoverer of comets and minor planets

Yet again, the shooting environment is the most important aspect. Werewolves away, you need to make sure that the moon is not out, as having it there would only decrease the probability of photographing these shooting stars by 50%. Also, having multiple cameras is an even safer bet if you’re serious – the old phrase strength in numbers rings true here. Confusion can arise with airplanes and satellites; they’re a very real presence and many amateur photographers often confuse the two. As silly as this may sound to some, but having a search for some images of each would help you most to prevent dud shots.

The best way to make sure you’re thoroughly prepared and if you have time, try practicing. Lightening and flying rocks in our galaxy may have nothing in common, but is a great way to practice capturing strokes of light in the night sky. Again, if you are going to try, make sure you stand in a more sheltered place – your safety is our priority. Still confused or think that this is a job that only Albert Einstein is qualified to do? Don’t be, here’s a step-by-step to help you:

  1. Check the weather, making sure it’s clear and isn’t on a night whether and where the moon is out in force.
  2. Pack your camera gear including the tripod, spare batteries and a nice chair and snacks as you’ll probably be out there for an hour at the very least.
  3. Find a dark spot that has no light pollution. If you have coordinates as to where best to view the solar event, make sure it’s an appropriate location.
  4. Set your camera up in the right position, facing the correct side depending on where the object is.
  5. If not already, make sure your camera is set to the correct settings: aperture open, shutter speed on B/ Bulb and a manual lens control.
  6. Attach your intervalometer if you have one
  7. Align the infinity mark on the lens, and ISO to either 800 and 1600. This can be changed easily if it’s off during your test run
  8. Test out the gear to make sure it works and your sample shot is in focus and has the appropriate exposure settings (20-30 seconds is the usual range)
  9. Wait for the event to kick-start your career in taking space photos and most importantly, enjoy this unique experience!

Bea is Nixplay’s Social Media Manager. She enjoys drinking coffee, reading about wars, and writing stories. Send her a message at beatrice.bisais@nixplay.com.

3 Tips for Incredible Portrait Photographs

Three Portrait Photo Tips for better pictures

“Make sure I look great,” we’ve heard that request too. Every time a friend or family member asks us to take a portrait photograph, we get a little competitive to make sure it’s the best portrait photo of them. After a lot of trial, error and reading we’ve come up with tips for incredible portrait photos. No hidden agenda, except, of course- we want the pictures on your Nixplay Photo Frame to look great!

1.Use the rule of thirds:

Firstly, the rule of thirds is a very basic portrait photography technique that can be quite hard to master ( talking from experience.) Mentally break down the portrait photograph you’re going to take into 3×3 squares. Remember viewers eye’s are most drawn to the intersection points in the grid. So think about what the most important parts of the photograph will be and place them accordingly. Pictures using the rule of thirds, look really great on Nixplay Digital Photo frames like the Nixplay Seed. Place the frame in covered patio or the living room and you will make your house guests jealous!

2.Don’t be scared to get close:

Our second portrait photo tip is that we’ve observed a lot of portrait photos and noticed that often, the subject is too far away. To make an impact, the subject needs to be big enough to be seen clearly and make an impact on the viewer. Now, don’t take that as – get them so close that we can only see the blackheads on their nose. I mean, unless that’s what you were aiming for. Close up portrait photos look great on wall mounted Nixplay Digital photo frames, the Nixplay Edge is a great choice.

3.Focus on the eyes:

Here’s our third, final photo tip for portraits. When looking at a portrait photo, notice that your eyes will always look at the subject’s eyes first (no, that was not an intentional tongue twister.) Make sure the eyes are sharp and in focus. Additionally, if you want to make sure the lighting and angle is perfect- move your camera around until you can see the light reflect in your subjects eyes! 

Bonus Technical tip: Exposure Compensation

Keep in mind that in photography, one exposure setting does not fit all. Your camera may underexpose someone of a lighter skin tone and overexpose someone with a darker skin tone.  Backgrounds of extreme light or darkness can also trick the camera. The easiest way to deal with this is to navigate to your camera’s exposure compensation control. To lighten up faces go dial up the stops ( i.e. +1) and to let less light in dial it down (i.e. -1) The Nixplay Iris dims and brightens your photos based on the light level- lucky for you that once you’ve fixed your exposure compensation, you don’t need to worry about the display on your Nixplay digital photo frame. 

If these tips were helpful, share your enhanced portrait photographs with us in the comments section or tag us on facebook, instagram or twitter.  We’d love it if you show us how the portraits look on your Nixplay Digital Photo Frame! #Nixplayphototips

Bea is Nixplay’s Social Media Manager. She enjoys drinking coffee, reading about wars, and writing stories. Send her a message at beatrice.bisais@nixplay.com.

Page 2 of 2

Powered by WordPress & Theme by Anders Norén