A Brief Guide to Displaying Fine Art Photographs

You’ve finally gotten that beautiful photograph you’ve wanted – the one you couldn’t take your eyes off of when you first saw it. It’s no run-of-the-mill photograph, either. It’s a piece of fine art that you just had to have for your home.

So now what? How do you display it in a manner that both protects it, and presents it in the best light?

Here are some tips for perfectly displaying that new fine art photograph in your home.

Framing

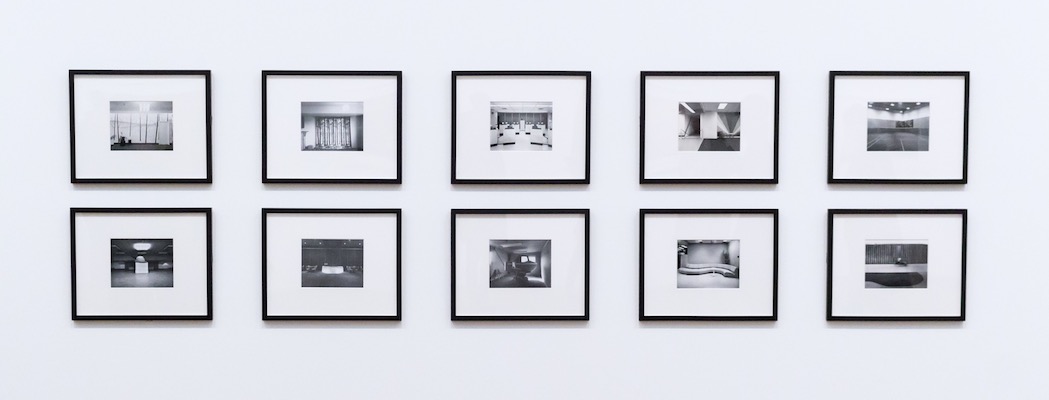
It might seem like the most obvious aspect of the process, but selecting the right frame is extremely important. And you absolutely do need a frame to display the photo properly.

Remember, an unframed photo isn’t just less attractive. It also leaves the photograph unprotected from damage by light, air, even fingerprints from the younger members of your household. Frame it like the valued item it is.

Types of frames

Not only do you need a frame – you also need the right type of frame for your new photographic masterpiece. Wooden frames are actually cheaper to buy than metal ones, and a deeply finished wooden frame can lend a real feel of elegance to your picture.

But metal frames shouldn’t necessarily be disregarded altogether. They’re generally easier to work with than wooden frames, and there are cases when a well-made metal kit frame may fit the style of your photograph better.

And don’t forget about colors in your frames, either. A well-polished black is a good modern approach, and silver is a solid choice for those with more traditional tastes.

As far as a finish on wooden or metal frames, a more muted luster is generally better than a highly polished shine, which can be distracting.

Hanging

What kind of wall are you displaying the photo on? At what height will you place it? Do you want your photo to be right at eye level, or mounted above a mantel or shelf?

You might want to consider what’s called “gallery height” for your photo, which is at a height of about 58 inches. If your photo is one of a series of pictures you’ll be hanging, they should be at the same height for the best presentation.

Even though you may have a great eye, it’s best not to guess whether your picture is hanging evenly. Instead, pull out your level to make sure.

Matting: Dry, conservation or pressure sensitive

While most frames that you buy at an arts and crafts store come with mats already included, if your piece is highly valuable you may want to choose a custom frame and custom mat. You can have this done at a frame store, or you can do it yourself.

There are several different methods you can use.

Dry mounting means you’re affixing the photo to a rigid backing. The main advantage of this process is that it can remove wrinkles and creases from the picture, but it’s also an irreversible process. Once you’ve dry mounted a photo, you’re stuck with it whether it worked or not.

If you’re looking for something more temporary, try pressure-sensitive mounting. It’s a procedure that’s similar to dry mounting, but it uses a special adhesive that doesn’t activate until it’s been applied to the photo. Then you simply apply pressure until the photo is in a fixed position.

On the positive side, it’s an easy process to pressure-mount a photo, and it’s inexpensive. It’s an ideal method for beginners who want to display a photo nicely.

As we mentioned, however, this is a temporary process. The adhesive isn’t powerful enough to hold the photo for a long period of time, so you’ll have to reapply at some point.

For most artwork you frame, you’ll want to use conservation matting. This method uses an acid-free mount board, hinges and acid-free tape.

The positive aspect of this approach is that it’s an excellent way to protect artwork that’s going to be displayed over a long period of time.

Unless the piece you’re displaying is of museum quality, you can almost certainly find conservation matting materials at a local frame store or arts and crafts store, and complete the process yourself.

Don’t forget that your digital photos can be beautifully displayed, too. For a stylish, elegant frame that will let you show off your family’s most precious digital images, try the Nixplay Iris.


7 Incredible Easter Desserts

One of the best parts of Easter – like any other holiday, really – has to be the food. Whether or not your family celebrates with a big Easter dinner, we’d bet that everyone around your table will enjoy some special springtime desserts.

Try one of these recipes for an excellent addition to the chocolate bunnies and jelly beans that the Easter bunny brings. And don’t forget to snap some pictures of your beautiful creation to display on your Nixplay WiFi Cloud Digital Frame!

Lemon Cheesecake Morning Buns from Willow Bird Baking

leman-cake

via Willow Bird Baking

Nothing says springtime like the bright, citrusy flavor of lemon – and adding in cheesecake just makes everything even better.

While they’re called “morning buns,” they’ll be just as welcome on the dessert table. They’re light and fluffy, filled with tangy cream cheese filling and topped with a lemon glaze.

Mini Strawberry Tarts from Southern Living 

mini-straberry

via My Recipes 

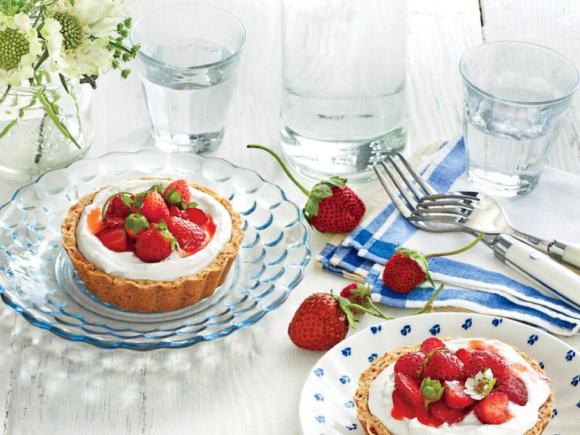
These pretty little tarts, with their bright red strawberries and white filling, will make for a beautiful presentation on your Easter table.

The recipe calls for pistachio pastry crust, which is no doubt delicious – but if you’re pressed for time, we bet you could use some pre-made mini pie crusts and no one would know the difference.

Carrot Cake with Salted Caramel-Cream Cheese Frosting from Betty Crocker 

carror-cake

via Betty Crocker

If you need a decadent, impressive dessert to display when family and friends come over for Easter brunch, this carrot cake with salted caramel-cream cheese frosting is the one for you.

Four layers high and finished with a drizzle of caramel sauce, this cake is not only food photo-worthy, but also completely delicious. Perhaps the best part is that is uses a box of cake mix as the base, so it’s easier to put together than it looks.

Chocolate Zucchini Cakes from Southern Living

chocklate-cale

via My Recipes

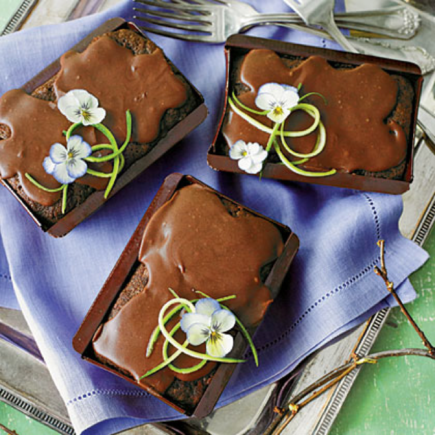
There’s nothing like adding a vegetable to your dessert to make you feel less guilty about eating it (see: carrot cake!). The best part about these intense chocolate zucchini cakes is that you’ll never know there’s anything healthy in them.

These cakes are rich, moist, and chocolatey, and covered with an incredible sour cream fudge frosting. They’re perfect for those Easter guests who don’t buy into the idea that springtime desserts must be light and citrusy.

Bunny Cookie Pops from Bakerella

bunny-cookie

via Bakerella

If you’ve got children who will be joining you for Easter, why not make these adorable bunny cookie pops? Better yet, let the kids help!

For this recipe, you’ll need white and pink candy wafers, a bunny candy mold, M&Ms or other candies for decoration, Oreos, and lollipop sticks. They’re easy, fun to decorate, and a definite eye-catcher.

Simple Easter Bunny Sugar Cookies from SheKnows

easter-bunny

via SheKnows

Who says sugar cookies are only for Christmastime?

Use either homemade or storebought sugar cookie dough, roll it out, cut out some bunny shapes, and pop them in the oven. Once they’re done and cooled, decorate them with icing, chocolate candies, jelly beans – whatever your (or your children’s) heart desires.

Homemade Peanut Butter Eggs from food.com

homemade-cake

via Food.com

You don’t need to run to the store for a chocolate peanut butter egg fix. You can make your own right at home with just peanut butter, powdered sugar, butter, milk, chocolate chips, and shortening.

Mix up the peanut butter filling by combining peanut butter, powdered sugar, butter, and milk and mold the resulting dough into egg shapes. Freeze the eggs for one hour. Then create your chocolate coating by melting the chocolate chips and shortening together, and dip your frozen eggs into the chocolate.

You can decorate them with sprinkles, candies, or royal icing.

Easter is a wonderful time to share delicious treats with friends. For more fun Easter ideas, check out our post “6 Fun Alternatives to Dyeing Easter Eggs.

6 Fun Alternatives to Dyeing Easter Eggs

Dyeing Easter eggs can be a great family project, but it’s far from the only way to decorate them this spring.

Maybe you’ve got very young kids who want something a bit more hands-on than just dunking an egg into a cup. Or maybe you want to create a more grown-up version of the Easter egg – one that will look beautiful nestled into an Easter-themed centerpiece.

Whatever you’re looking for, take a look at this list for some fun alternative ideas to dyeing Easter eggs!

Painted eggs

Young children may enjoy painting eggs more than dyeing them, as it allows them to exercise their creativity and use bolder, brighter colors.

If you’re painting eggs, all you need are a few hard-boiled eggs, paintbrushes and some kids’ fingerpaint, tempera paint, or watercolors. You can also use sponges to create a more textured look. Children may also enjoy placing stickers in the shape of birds, flowers, etc. on their eggs and painting around them. After the paint dries, remove the stickers and you’ll have a design in white relief.

Glittery eggs

eggs

via CraftaholicsAnonymous.net

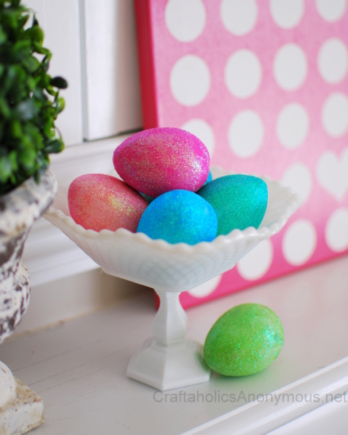
If you’re ready to get a little bit messy, glittery eggs can be tons of fun!

One method of creating sparkly, glitter-covered eggs is to first dye the eggs and let them dry. Then, mix together Elmer’s glue and whatever color glitter you want to use, and paint the eggs with the mixture. Since the glue will dry clear, all that will show up is the glitter.

Another way to create glittery eggs is to simply paint them with Elmer’s glue, sprinkle some glitter on a piece of paper, and roll the eggs through the glitter.

Black-and-white doodled eggs 

paper-stiches

via Paper & Stitch

Create striking Easter eggs with nothing more than a Sharpie.

Sketch out a pattern or design you want to create on paper first, so you have an idea of what your finished product will look like. Then draw that design onto a hard-boiled or blown egg. Geometric patterns, floral designs, and other repeating patterns will look best.

Pressed flower eggs 

magic-onios

via The Magic Onions 

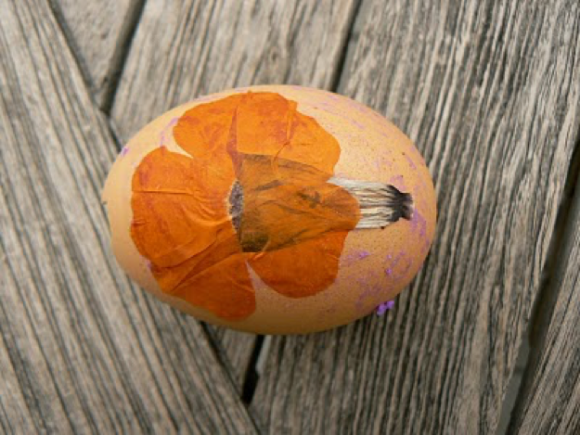
If you have time to press some flowers before making your Easter eggs, this can be a wonderful, unique project.

About a week or so before you want to create your eggs, pick a few flowers (make sure they’re clean and dry) and press them in a flower press. If you don’t have a press, simply line a book with parchment paper, sandwich the flowers between the paper, and weigh it down with a heavy encyclopedia or other book.

Fabric-dyed Easter eggs 

better-homes

via Better Homes & Gardens

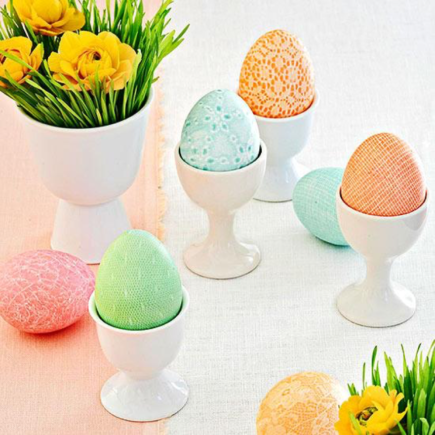
One interesting way to create unique dyed eggs is to wrap them in a textured fabric, like lace or tulle, and dip them into Easter egg dye.

Cut a square of your chosen fabric, wrap it around the egg, and secure it with a rubber band. Then dip the egg into your dye, allow it to dry, and remove the fabric. You’ll end up with a beautiful egg covered in an intricate design.

Sprinkle eggs 

studio-diy

via Studio DIY

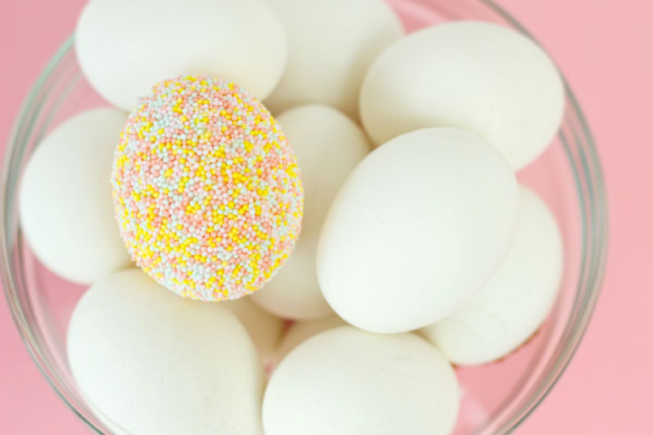
Somewhat akin to glitter eggs, sprinkle eggs are easy to make and especially fun for kids.

To start, pour some pastel (or any color you like!) sprinkles into a bowl. You want your egg to have plenty of room. Paint your egg with glue (something a bit stronger than Elmer’s will be necessary – Studio DIY suggests tacky glue) and then press the egg into the sprinkles in the bowl.

To cover the rest of the egg, spoon the sprinkles over it and firmly press the curved part of the spoon onto the egg to help the sprinkles set.

Easter is the perfect time to create original egg decorations that are a bit more out of the ordinary than your typical dyed eggs. For more creative springtime projects, take a look at our post “Take Incredible Springtime Photos with These Photography Tips.”

4 Reasons to Hire a Professional Photographer for Your Family Photo Shoot

We’ve all got those friends who dabble in photography – the ones whose services are often called upon for taking the big group shots, or for capturing extra photos at weddings, christenings, and bar mitzvahs.

Amateur photographers can be incredibly talented, and after all, you’ve got to be an amateur before you can be a professional, right? Lots of people end up hiring amateurs for everything from family portraits, to newborn photo sessions.

While there’s nothing wrong with asking a photography-savvy friend to do a family portrait session, professionals can offer certain things that amateurs just may not be able to.

Here are a few reasons why hiring a professional photographer for your family photo shoot might be the right choice.

You know you’ll get what you want

When you’re paying a professional photographer, they’re working for you – you don’t have to worry about taking up too much of their time, requesting changes of location or style, or wanting to experiment with lots of different compositions or poses.

With a friend, you can easily start to feel that you’re being too demanding, or making the shoot inconvenient for them. That can be true even if your friend is more than willing to offer their time and services.

Now, of course one must always be kind and respectful of a photographer’s time, whether that photographer is a pro or not. However, since hiring a photographer often includes a set number of hours, it’s generally easier to set limits.

A pro will use more sophisticated camera equipment, letting them capture a wider variety of shots

Unless your amateur friend is also a collector of expensive, advanced camera equipment, it’s almost certain that a pro will have better photographic equipment.

It may not seem like it, but light meters, remote flashes, lighting umbrellas, and special lenses can make a world of difference when it comes to portraits. Lenses, in particular, can allow your photographer to capture different formats, like wide-angle and panorama shots. These can add an element of uniqueness to your portrait session.

Not only can a pro take better shots, they can edit them more effectively, too

Your photographer’s work doesn’t end once your session is complete and you and your family have headed back home.

On the contrary, now your photographer must go through the challenging work of culling through the hundreds of images he or she took to find the best ones.

Then those images have to go through an editing process – and if you’ve ever worked in a photo editing program before, you know how time-consuming editing photographs can be.

Professionals are great at directing their subjects, including children

Perhaps one of the most overlooked reasons that hiring a professional photographer can be a smart move for your family photo shoot is that pros know how to direct people.

Think about the last time you tried to get your entire family to sit still together, while dressed nicely and looking happy. It’s not that easy. Pros, on the other hand, are used to getting everyone’s attention, telling them what to do next, and keeping the session moving along. They’re also good at helping everyone get comfortable in front of the camera.

If you’ve got very young children or babies, you may want to consider searching for a photographer who specializes in working with kids.

As any parent knows all too well, getting a child to smile or laugh, especially in front of a camera isn’t always easy. A great child photographer will know how to draw your child out and get the best possible images.

When thinking about doing a family portrait session, it can really pay off to hire a professional, rather than rely on a friend or family member. It may cost more up front, but what you get in return will be more than worth it.

Once you’ve got your portraits, naturally you’ll want to display them. Get some ideas on how by reading our post “6 Fun Ways to Integrate Family Photos into Your Home Decor.”

Tips for Taking Amazing Landscape Photos

Landscape photography can be a tricky thing to master. Unlike portraits, there’s often not a clear point of focus that you can train your lens on. Much is left to the photographer’s discretion, which can be freeing, but also challenging.

To help you develop your own landscape photography, here are a few tips from the pros.

Try to shoot during the golden hours

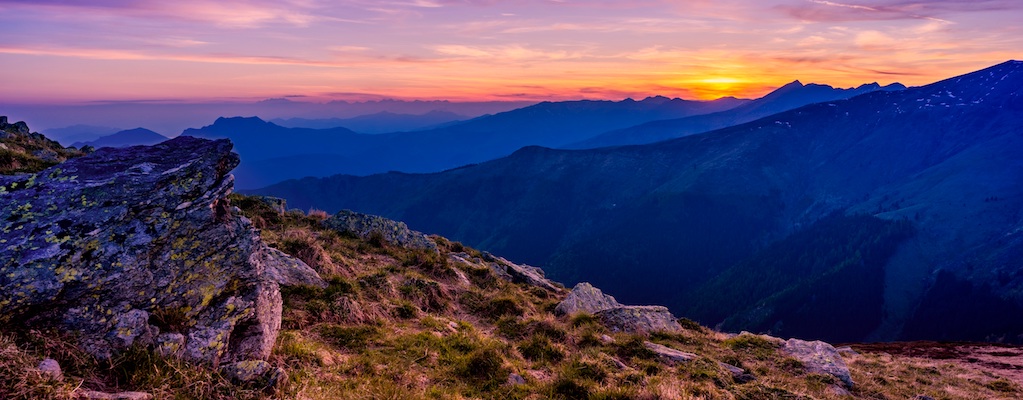
The golden hours – the hour just after sunrise and the hour just before sunrise – are coveted among all kinds of photographers (filmmakers too), but landscape photographers in particular take their best shots during these times of day.

It requires a good deal of planning, of course, to be on location just after sunrise, so make sure you map out where you want to shoot the day before. If you can catch this magical time, your photos will be suffused with a warm, golden light that can make even the most mundane landscape look almost otherworldly.

Keep an eye on the weather

It goes without saying that the weather has a huge effect on outdoor photography. And we’re not just talking about rain or snow.

Sunny days can be good if you want a lot of light and you know how to keep your photos from being overexposed. However, remember that high noon is rarely a good time to shoot, as subjects – even inanimate ones – tend to look best when the light is hitting them from the side, rather than directly above.

Slightly overcast days can also make for great outdoor photography days. A softer light can give your photos a moody quality, perfect for shooting remote or barren locations.

Scope out your position beforehand

While it’s certainly possible to get a great landscape photo just by showing up at a beautiful spot and taking out your camera, you’re a lot more likely to get a high-quality photo if you scope the area out beforehand.

Take some time to walk around the area you want to shoot, keeping an eye out for the best perspectives. Often, it’s tempting to simply stop at the designated “photo spots” or lookouts and shoot from there. But remember – that’s the exact same photograph that everyone else is taking.

To keep your images unique, look for views off the beaten path and find the ones that speak to you.

Incorporate a focal point

Even though landscape photos can work without a specific focal point, in general it’s a good rule to include one. Focal points help give your viewers a place to fasten their eye, which generally means that they’ll keep looking at your photo for longer.

A focal point could be anything in landscape photography – a flower, a rock or outcropping, an animal, a person, or a building. Make sure you think about where you place that focal point, using the Rule of Thirds to create the best composition.

Maximize your depth of field

Maximizing your depth of field means that your entire shot, back to front, will be in focus. This is the standard approach for landscape photographs, because it’s generally most pleasing to the eye.

To do this, you want to choose a small aperture and focus about one-third into the shot. This will ensure you get a sharp focus throughout the entire picture.

Use a tripod

Using a tripod is a good idea no matter what kind of photo you’re taking, but especially in landscape photos, which can necessitate slower shutter speeds and therefore suffer from even the most microscopic of shakes.

If you shoot outside often, you may want to invest in a lightweight tripod. That’ll make a big difference when you’re lugging your equipment up trails and along beaches.

Shooting landscape photographs requires some different techniques than portraits or action photography. But with a little practice, you can begin taking beautiful landscape photos, too. Then make sure to share them with friends and famliy via your Nixplay WiFi Cloud Frame.

Page 69 of 91

Powered by WordPress & Theme by Anders Norén